
Whether you’re a museum looking to expand your reach and enhance accessibility, a corporate campus that needs to orient new employees on their own time, or a tour operator planning a historical walking tour, GPS audio tours play relevant audio (and other content) when visitors reach specific points.
In this article, we’ll provide background information on how GPS works, explain what a GPS audio tour is, explore the underlying technologies that make it work (including alternatives), and provide a step-by-step tutorial for building one yourself.
What is GPS?
GPS is an acronym for global positioning system, a network of 30+ navigation satellites that circle the earth. These satellites constantly send out signals that tell us where they are. GPS receivers in our phones and other devices listen for these transmitted signals, and calculates its distance from the satellite. Once your receiver figures out how far it is from four or more satellites, it can then figure out where you are located via a process called trilateration.
What is a GPS audio tour?
A GPS audio tour uses this knowledge about your physical location to present you with audio and other content for walking tours, driving tours, and indoor mobile guides.
An example is a walking tour that presents a ‘get directions’ button leading you to the next historic building from your current location. When you physically get there, you can play audio, see a before-and-after comparison of what it used to look like, take a quiz, and then move on to the next stop.
In other forms, GPS audio tours use technologies like Bluetooth Beacons or Geofencing to trigger audio content when you’re within range of a specific signal.
How does a GPS audio tour work?
There are two main technologies for triggering audio tours when a visitor is near a location or object: Bluetooth beacons and geofencing.
Bluetooth Beacons
Bluetooth beacons are kind of like radio stations. They’re small devices that continuously broadcast a unique identifier using radio waves.
These identifiers can be detected by nearby smartphones, tablets, and other Bluetooth-enabled devices via a technology called Bluetooth Low Energy (BLE). When a phone is within range of a beacon’s signal (anywhere from a couple inches to 300 feet, depending on the type of transmitter), it can trigger specific actions in a compatible app based on that proximity.
Beacons can run for months or years on a single battery.
Geofencing
Geofencing is, as its name suggests, like a fence. It is a means of creating a virtual boundary around a geographic area using GPS. When someone enters the boundary (within about 5 meters), software can trigger specific actions, like opening a page in an app, sending a notification, or playing audio.
The technology is used across many industries, from tourism to fast food restaurants that wait until they’ve detected you’re in the parking lot to start preparing your order. In an audio tour context, geofencing can be used to alert you to nearby landmarks.
Are there accessibility or privacy issues with bluetooth beacons and geofencing?
Both technologies may sound great, but if you’re thinking about implementing them, be aware of their accessibility and privacy issues. These include:
Privacy laws like GDPR or CCPA require you to ask for a user’s consent before taking an action. Playing audio without asking first can open your organization to litigation. Let your visitors press play on the audio when they’re ready for it.
Additionally, WCAG accessibility guidelines specifically warn against automatically playing audio content.
Visitors with privacy concerns may not give you permission to track their location, rendering geofencing useless
Auto-play audio is annoying, and can be overwhelming for visitors with sensory needs. If you’ve ever used a website that starts playing music you can’t stop as soon as the page loads, you have some idea of what that experience can be like.
What’s the catch?
Now that you know how beacons and geofencing work, here’s the bad news: most audio tour apps don’t support them.
callout: Most tour builder apps progressive web apps (or PWAs), rather than native apps downloaded to a visitor’s phone. They run in a browser, usually include an offline mode, and are often accessed by scanning a QR code.
The upside is that your visitors are 2x to 3x more likely to use a PWA than a platform that requires them to download an app, per a 2025 Nubart study.
Visitor App Usage: Native Apps vs. PWAs
Museums and cultural organizations see significantly higher engagement when using Progressive Web Apps compared to native mobile applications.
The tradeoff is that web apps lack the deep device integration you’d get with a native app, like continuous background access to a visitor’s location.
If your organization needs to use Bluetooth beacons or geofencing, you’ll need a platform that includes a native iOS and Android app, which will be more expensive.
Because of this, geofencing and Bluetooth Beacons are not an option for everyone. But fear not, there are alternatives.
An alternative to Bluetooth Beacons: Deep-linked QR codes
Platforms like Tourient have deep-link QR code generation built in. These QR codes link directly to specific tour stops, and can be scanned by the camera of any modern smartphone. Many organizations place deep-linked QR codes near each stop, and combine them with latitude and longitude points to guide visitors directly to locations.
Deep-linked QR codes also mitigate the privacy and accessibility concerns of automatically playing audio when a visitor is near a tour stop or object. Because a visitor is taking action to scan the QR code, they are explicitly consenting to viewing your audio tour.
And some tour platforms let you enable auto-play on a per-tour basis, so that audio content automatically plays when the page loads.
An alternative to Geofencing: Tour access codes
Tour access codes (also called gatekeeping) let you restrict who can view a tour. They’re a form of low-tech geofencing. Visitors enter a code (letters, numbers, or some combination thereof) before they can access the content. It’s similar to entering a password to join a Wi-Fi network.
This is useful when you want to limit a tour to a specific area or audience. A museum might use access codes to offer a premium audio tour only to members or paid visitors. A corporate campus could use them to keep an employee orientation tour from being publicly accessible. Tour operators can sell codes.
You generate a code (or a batch of codes) in a tour builder platform, and the tour stays locked until someone enters a valid one. Some platforms let you create single-use codes, multi-use codes, or codes that expire after a set period.
How to build a GPS audio tour in 8 steps
1. Determine your requirements
Before you compare platforms or start recording audio, figure out what kind of experience you're trying to create and what you need to get there. Define the problem, then find a solution.
Start with the basics. Is this a walking tour through a historic neighborhood? A driving tour through wine country? A mobile guide for a gallery?
Next, think about content. Do you just need audio and text, or do you want to include image galleries, video embeds, quizzes, before-and-after comparisons, or gamification elements?
Not every platform supports all of these, so knowing what you want early on saves you from switching platforms later. And some platforms lack data import and export tools, so you may be more stuck than you realize.
Reminder: if you need Bluetooth beacons or geofencing to trigger content automatically, you'll need a platform with a native iOS and Android app. That's a significant cost increase—we're talking thousands to tens of thousands of dollars, plus ongoing maintenance.
For most organizations, deep-linked QR codes combined with GPS coordinates are a more practical and cost-effective approach.
And don't forget to set a budget. Tour builder platforms range from free (like Bloomberg Connects) to tens of thousands of dollars per year. Each one is built for different organizations with different needs, so price alone won't tell you whether it's the right fit. Knowing your ceiling helps you narrow your options.
2. Choose a tour app builder
The platform you choose depends on the requirements you defined in step one. What works best for a state park system with 61 locations may not be the same as what works for a small gallery with a single tour. Figure out what you need, what you want, and compare audio tour apps to find one that meets your needs, wants, and budget.
Take advantage of demos and free trials
Don't just watch a walkthrough video: actually create a tour, publish it, and try taking it as a visitor would. Walk through the experience on your phone. See what it feels like to navigate between stops, play audio, and interact with content. That hands-on test will tell you more than any feature comparison chart.
Look for reviews if they exist. Ask the platform for testimonials or references — existing clients you can contact to ask about their real experience. How's the support? How often does the platform update? Did it deliver on what was promised?
3. Create a tour
Once you've chosen a platform, create your first tour. Most platforms will ask you to give it a title, a description, featured image, and some basic settings like language and whether the tour is public or access-code protected.
This is also where you'll typically set up your tour's branding (if the platform supports that): things like colors, fonts, logos. First impressions matter. A visitor who scans a QR code and lands on a polished, professional-looking tour is more likely to stick around than if they see something that looks like it was thrown together with spare parts.
4. Add tour stops
Tour stops are the individual locations or objects that make up your tour. For each stop, you'll add a title, a description, and — if you’re building a GPS audio tour — latitude and longitude coordinates.
Those coordinates are what connect your tour to the physical world. They power the "get directions" feature that guides visitors from one stop to the next using their phone's built-in GPS. Without them, visitors have to figure out where to go on their own, which is fine for a small indoor exhibit (where the directions are “walk into the next room”) but frustrating for a multi-hour tour across a city.
If your tour is indoors or in a small area (like a community garden), consider using deep-linked QR codes at each stop instead. Visitors scan the code and go directly to that stop's content — no GPS needed.
Add images and other content
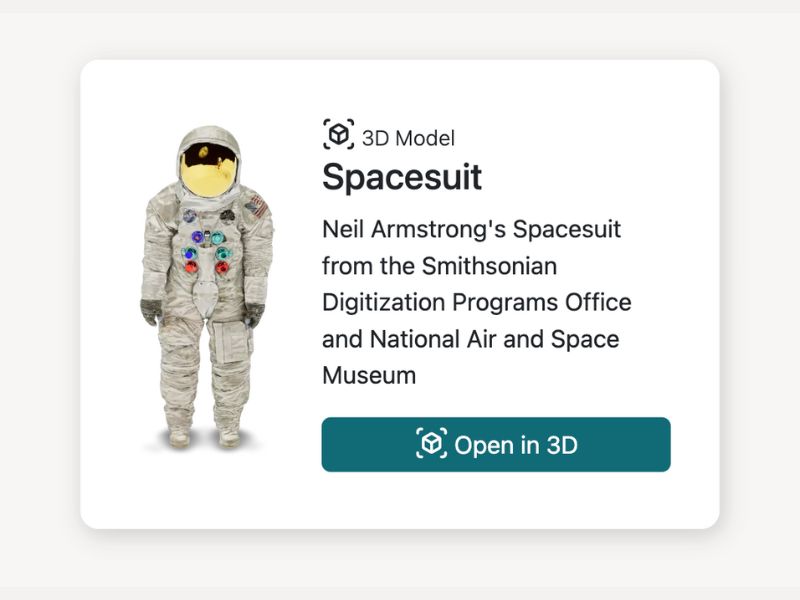
Some platforms just support text and audio, while others let you add images, videos, and other interactive content. Imagine a comparison of how a building looked a hundred years ago, to how it looks today. A short video of an artist explaining their technique. A quiz that tests what a visitor just learned (if they were paying attention). These kinds of content keep people engaged, and slow them down to focus on what’s in front of them.
Here's an example so you can take a break from reading.
5. Add audio and transcripts
Audio is the core of an audio tour, so it's worth getting right. Whether you're recording narration yourself, hiring a voice actor, or using text-to-speech, aim for clear, well-paced audio that sounds natural.
Always include transcripts. They're technically optional, but they make your tour accessible to visitors who are deaf or hard of hearing, visitors who prefer reading to listening, and visitors in noisy environments where audio isn't practical, or for people (like me) that need subtitles to follow along.
They also help with SEO if your tours are publicly indexed. Some tour builder platforms include tools to create transcripts from your audio, while others don’t.
6. Make your images accessible
For every image, write descriptive alt text. ALT text (alternative text) is a short description of the image that screen readers read aloud to visitors who are blind or have low vision. It's an accessibility requirement, not a nice-to-have. The same goes for captions: they provide context that the image alone may not be able to communicate.
7. Publish and share
You've built your tour, added stops, recorded audio, written transcripts, and filled it with images and content. Now it's time to get it in front of visitors.
Be visible
Start with QR codes. Print them and place them where visitors will see them: on tent cards near your front desk, on signage near objects or landmarks, laminated and attached to outdoor stops, or included in printed maps and brochures. If your platform generates deep-linked QR codes, each one can take visitors directly to a specific stop. This is especially useful for indoor tours where visitors might not follow a linear path.
Build awareness
Share your tour on social media, add it to your website, and include it in email newsletters. If your platform generates social-ready images or share links, use them.
The easier you make it for someone to find your tour, the more people will take it. I’ve been to many museums that I had no idea there was a tour with more context until I saw a small sign tucked into a corner somewhere. If your visitors don’t know it exists, they won’t use it.
Share to the right audience
If your tour is for a specific audience — like museum members or conference attendees — you could use gatekeeping features like tour access codes, and distribute them through the appropriate channels: at the admission desk, in a welcome email, or printed on event badges.
8. Get feedback and improve
Publishing your tour isn't the finish line. It's the starting point. We know museums and galleries are often allergic to feedback, but you're creating these tours for people who aren't you. Get off your high horse.
Ask visitors what they think
Was the audio too long? Were the directions clear? Did they skip any stops? You can collect feedback through post-tour surveys, comment cards, or simply asking people in person. If they tell you the QR codes are too low to scan, move them.
Monitor analytics
Check your platform's analytics regularly. Most tour builders track basic metrics like how many people started the tour, how many finished it, which stops were most and least visited, and how long visitors spent at each one. These numbers tell you where your tour is working and where it's falling flat.
Use that feedback to iterate. Trim audio that's too long, replace content that doesn’t resonate, rewrite descriptions that confuse people, and add content to stops that visitors seem to rush through.
A good tour is never really done. But it gets better every time you revisit it.